|
1
|
From the side menu, select Payables > Add Recurring Payable. A new Recurring Payable screen appears.
|
|
|
If you are using Voyager Construction and Job Costing, select Payable (JC) > Add Recurring Payable. The Construction and Job Costing Recurring Payable screen includes additional fields, which are described in this procedure with the designation “Construction only.”
|

Payee Type the code for a payee.
Contract (Construction only) If the recurring payable is for a contract, type or select a contract code. If you select a contract, click Load Contract/Info and review the details available for the selected contract on the Contract Details screen.
Hold Payment Select the hold payment status for this invoice:
|
|
If you select a status that holds payment, you will not be able to process a payment for this invoice until you change the Hold Payment status to one that allows payment.
|
Default Voyager uses the setting from the Vendor screen.
Consolidate Select whether to consolidate this payable with others for this vendor, or to process this payable with a separate check.
Total Amount Type the total amount to be paid.
Approved by Type the name of the person who approved the recurring payable.
Priority Select a priority.
Type Select the type of recurring payable transaction.
For Benefit Of If the payment is being made on behalf of a resident, type or select the code for the resident.
Post Code Type the code you want to use for posting the recurring payable. You can use the same post code for more than one recurring payable. For example, if you want to post the recurring payable every month, you might use monthly as the code.
Date Range Type the date range during which you want the recurring payable to be in effect. Leave the second field blank if you want to continue posting the recurring payable indefinitely.
Post Months Click the check box for each month you want Voyager to post the recurring payable.
Recur Day Type the day, between 1 and 28, you want the payable to recur. This day will be the invoice date on payables posted from this recurring payable.
Due Day Type the day, between 1 and 28, the recurring payable is due. This day will be the due day on invoices posted with this recurring payable.
Post Warning If you click this check box, Voyager will prevent you from posting the recurring payable more than once during the same post month. If you attempt to do so, a Duplicate Posting message notifies you that Voyager did not post the recurring payable again.
|
3
|
If you are using Voyager Construction and Job Costing, you can click Prompt Defaults to automatically complete the Property and Account columns.
|
Contract (Construction only) If the payable is part of a contract, type or select the contract code.
Job (Construction only) Type or select the job code.
Entity Type or select a property code.
Amount Type the monetary amount. As you complete the spreadsheet, the amount still unapplied against the total appears at the bottom of the spreadsheet.
Retention (Construction only) Voyager tracks retention in this column when you enter payables, process checks, and pay retention. Voyager distributes the retention to the retention account when you process a check to pay the original invoice.
Categ (Construction only) Type or select a job category code.
C (Construction only) Type the first character of the Cost Code subdivision for the cost category. For example, type L for Labor, M for Material, or E for Equipment.
Account Type or select a G/L account.
User-defined segments Complete the user-defined columns that follow the Account column in accordance with your organization's policies. For more information, see “G/L Segments” in the Voyager Core Setup Guide.
2nd Vendor (Construction only) You can type or select a secondary vendor for each line item. If you assign a secondary vendor, Voyager displays the secondary vendor code on the Contract screen.
|
|
If you have installed the optional parameter bCMWJointCheckText, Voyager permits you to type free-form text in the 2nd Vendor field.
If the secondary vendor requires a joint payee, Voyager will display that joint payee in the Joint Payee field on the Approve Payables screen and the Process Checks screen.
|
|
|
Draw Info (Construction only) After the recurring payable has been posted, Voyager this field with the draw number.
Draw Date (Construction only) After you run Charge From Costs, Voyager completes this field with the draw date. For additional information, see “Generating Draw Worksheets Using the Charge from Costs Screen” in the Voyager Construction and Job Costing User's Guide.
Chk Voyager adds the check number to this field when you process the payment.
PO#/WO# Voyager completes this field for invoices created from purchase orders or work orders.
|
|
a
|
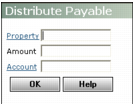
Property Type or select the codes for the properties or property lists.
Amount Type the total amount you want distributed.
Account If you want to use the same G/L account for each property, type or select the account number. If you want to use different G/L accounts, leave this field blank and type the account numbers in the Recurring Payables screen.
|
c
|
Click OK. Voyager adds a line to the spreadsheet for each property in the distribution and splits the total amount evenly by the number or properties.
|
Cash Acct Type or select a G/L cash account.
AP Acct Type or select a G/L accounts payable account.
|
7
|
Click Save.
|