|
1
|
From the side menu, select G/L > Bank Functions > Bank Reconcile. The Bank Reconciliation filter appears.
|
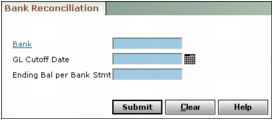
Bank Type or select a bank account code.
Closing Day Type the cutoff date (mm/dd/yy) of the G/L month you want to reconcile. It should be as close as possible to the date on the bank statement. All properties that share the same bank account must have the same end-of-month (EOM) day.
Statement Amount Type the ending balance from the bank statement.
|
3
|
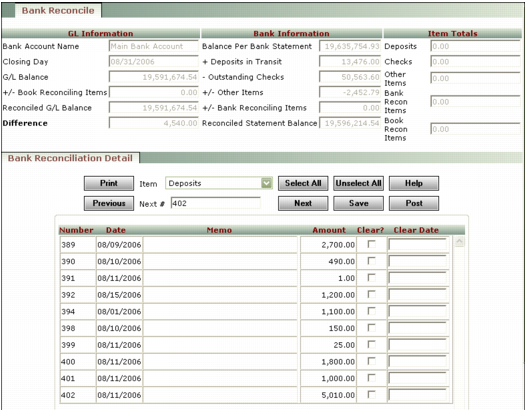
Bank Account Name This field displays the bank name.
Closing Day This field displays the closing day for the G/L month you want to reconcile.
G/L Balance This field displays the ending G/L balance for the cash account (cash basis) linked to the bank account.
+/- Book Reconciling Items This field displays unreconciled items that have been entered through the Bank Adjustments screen, with a Type of Book.
Reconciled G/L Balance The value in this field is equal to: G/L Balance +/- unreconciled book items.
Difference This field displays the difference between the Reconciled Statement Balance and the Reconciled G/L Balance.
|
5
|
Review the Bank Information section:
|
+ Deposits in Transit This field displays unreconciled deposits dated on or before the date specified in the Closing Day field.
- Outstanding Checks This field displays outstanding cheques dated on or before the Closing Day.
+/- Other Items This field displays unreconciled journal entries (to the cash account), NSFs, and payables with a Type of Adjustment.
+/- Bank Reconciling Items This field displays unreconciled items that have been entered through the Bank Adjustments screen, with a Type of Bank.
Reconciled Statement Balance The value in this field represents the combined Balance Per Bank Statement and + Deposits in Transit amounts, minus the - Outstanding Checks amount, plus or minus the +/- Other Items and +/- Bank Adjustments amounts.
|
6
|
From the Item drop-down list, select the type of transaction you want to clear (deposits, checks, and so on).
|
|
|
Transactions appear in the Bank Reconciliation Detail spreadsheet based on the transaction date, not the post month. The transaction date must be before or during the month being reconciled for the transaction to appear in the Bank Reconciliation Detail spreadsheet.
|
|
7
|
Select the Clear checkbox for each transaction that appears on the bank statement. As you clear transactions, Voyager updates fields in the top part of the screen. Use the scroll bar and the Next button to view additional transactions.
|
|
8
|
If you want to specify the date a transaction cleared, type it in the Clear Date field. If you do not specify a date, Voyager completes the field with the cut-off date from the Bank Reconcile filter when you click Save. Clear dates are used in Historical Bank Reconcile reports.
|
|
9
|
|
|
You can view a reconciliation report at any time by clicking Print. The report appears in Crystal Reports Viewer.
|
|
11
|
When the Reconciled Statement Balance agrees with the Reconciled G/L Balance, click Post. The Bank Reconciliation Report appears.
|
You can print this report and file it as a Proof Of Cash report. You can view and print earlier bank reconciliation reports by selecting Reports > Financial > Bank Reconcile History.