|
1
|
|
|
If you are using Voyager Construction and Job Costing, select G/L (JC) > Edit Batch Job Cost JE.
|
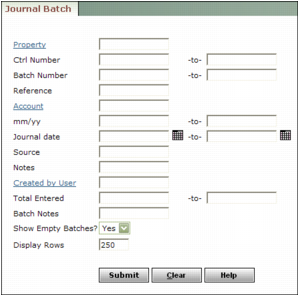
Property Type or select a property code.
Ctrl Number Type or select a control number or range of control numbers.
Batch Number Type or select a batch number or range of batch numbers.
Reference Type text from the journal entry Reference field.
Account Type or select a G/L account number.
mm/yy Type a month or range of months.
Journal date Type or select a date or range of dates.
Source Type text from the Source field.
Notes Type text from the Remarks field for a line item.
Created by User Type or select a user code.
Total Entered Type an amount or range of amounts.
Batch Notes Type text from the Notes field for the batch.
Show Empty Batches Select whether you want Voyager to display the links for empty batches in the list of batches that match the search criteria.
|
3
|
|
1
|
|
2
|
Click Delete. Voyager asks you to confirm deletion.
|
|
3
|
|
4
|
Click OK.
|
|
1
|
|
2
|
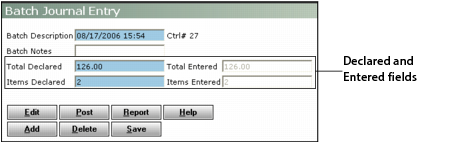
If necessary, adjust figures in the Declared fields for the entry you are adding.
|
|
3
|
|
4
|
Complete the screen for the new journal entry and click Save. See “To create a journal entry batch” for more information about adding a journal entry.
|
|
1
|
|
2
|
If necessary, adjust figures in the Declared fields for the entry you are editing or deleting.
|
|
3
|
Click Edit. The Journal Entry screen appears, displaying the first journal entry in the batch. A list of journal entries included in the batch appears in the navigation list on the left side of the screen.
|
|
4
|
|
5
|
|
6
|
If you want to edit the entry, make changes and click Save. See “To create a journal entry batch” for detailed information about working with the Journal Entry screen.
|
|
|
To return to the Batch Journal Entry screen, click the batch number at the top right of any Journal Entry screen.
|