|
l
|
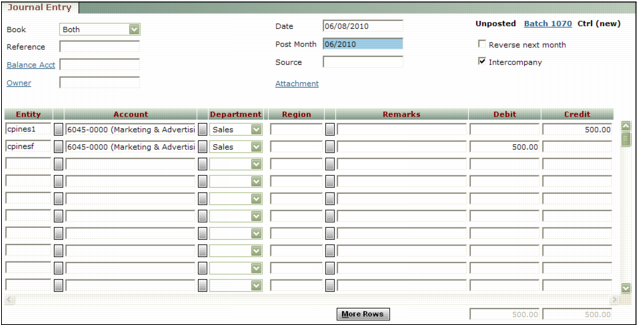
The Intercompany check box must be selected on the Journal Entry screen, to tell Voyager to add intercompany line items to the journal entry when you click Save.
|
|
|
The Intercompany check box is available only for new journal entries; you cannot convert an existing journal entry to an intercompany journal entry. Voyager deselects the Intercompany check box after the journal entry has been processed, because no further intercompany processing is required.
|
|
l
|
The Balance Account field must be empty.
|
|
l
|
The Interco Table must include an entry of the Journal or All type that establishes the intercompany relationships for the entities included in the journal entry.
|
|
|
|
|
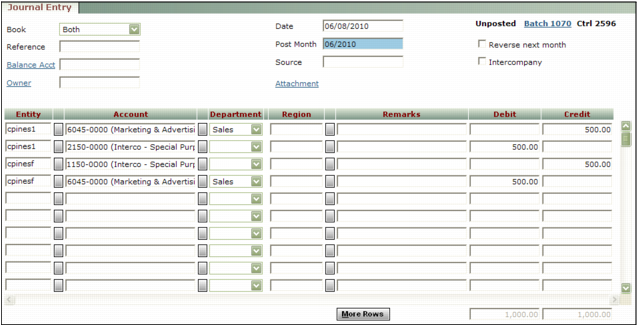
When you click Save, Voyager queries the entity in each detail line, and adds lines for intercompany accounting. After it adds the intercompany line items, the last line of the journal entry will not necessarily be for the funding entity, and the other lines will not all be for the funded entities.
|
The following procedure provides instructions specific to intercompany journal entries. For general information about creating journal entries, see “Creating Journal Entry Batches”.
|
1
|
|
|
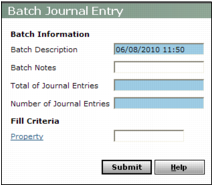
Leave the Property field empty to avoid having to change the Entity fields on the Journal Entry screen. The intercompany journal entry will include at least two entities: the funding entity and at least one funded entity.
|
|
3
|
|
4
|
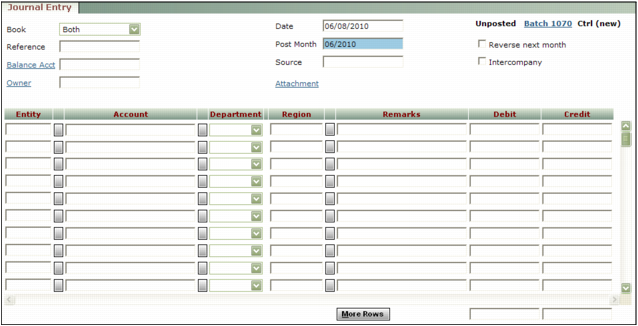
Complete the top part of the screen, leaving the Balance Acct field empty and selecting the Intercompany check box.
|
|
|
|
|
The Interco Table must include an entry that establishes the intercompany relationship for journal entries. For information about setting up intercompany relationships, see “Defining Intercompany Relationships”.
|
|
6
|
Click Save.
|