When you receive a set of postdated cheques, you add those cheques to the Voyager database through the Add Postdated Cheques filter.
|
1
|
From the side menu, select Receivables > Post Dated Cheques > Add Post Dated Cheques. The Add Post Dated Cheques screen appears.
|
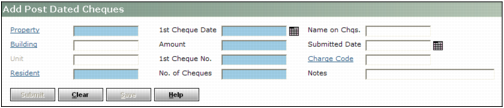
Property Type the code for the property to which payments will apply.
Unit If the unit is a condominium, type the unit code. (This field is available only for condo units.)
Building Type or select the building code.
Resident Type the code for the resident, commercial lease, or condo owner.
1st Cheque Date Type or select the date of the first cheque, typically the day of the month on which rent is due. By default, Voyager uses the same day of the month for subsequent cheques, but the dates for individual cheques can be edited.
Amount Type the amount for the first cheque. By default, Voyager uses the same amount for subsequent cheques, but the amounts for individual cheques can be edited.
1st Cheque Number Type the number for the first cheque in the series. By default, Voyager uses the immediate following numbers for subsequent cheques. For example, if the first cheque number is 1001, the subsequent cheques will be 1002, 1003, and so on.
No. of Cheques Type the number of cheques provided by the resident. Voyager creates this number of postdated cheque records.
Name on Cheques If the name on the cheque matches the name from the resident, commercial lease, or condo owner record, leave this field empty. If the name on the cheques is different, type it here so that it appears in the Notes field on the receipts Voyager creates when you apply postdated cheques.
|
|
If both the Name on Cheques field and the Notes field contain text, only the text from the Notes field appears on the receipt.
|
Submitted Date Type or select the date that you received the cheques. If this field is empty, Voyager uses the current date.
Charge Code If the cheques should apply only to a specific charge type (rent, for example), type or select the charge code.
Notes Type text that you want to appear in the Notes field on the receipts Voyager creates when you apply postdated cheques.
|
3
|
|
|
The payment method for the resident, tenant, or owner must be set to 'Any'. If the payment method is set to something else, a warning will appear at the top of the screen when you save the PDC record. By clicking Submit again, the PDC record will be created. However, when you apply the PDC the record, it will not be posted.
|
|
5
|
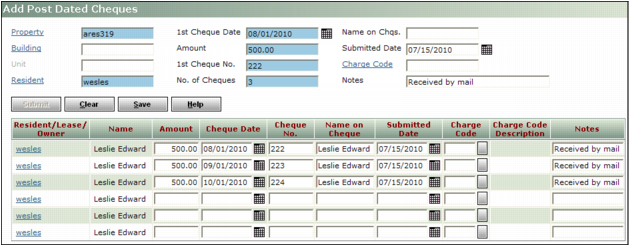
Click Save. A confirmation request appears.
|
|
6
|
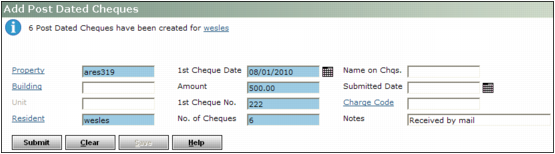
Click OK. An information note appears at the top of the screen showing the number of post-dated cheques records created and the resident, lease, or owner code.
|
|
|
If a postdated cheque record already exists for a cheque date, a warning appears at the top of the screen. If you click Save again, Voyager overwrites the prior record with the new one.
|